 SpaceSniffer is our Geek Software of the Week! It provides a TON of information on your PC’s disk usage! If you are trying to clean up, this is the tool you need!
Uderzo Software SpaceSniffer
“Description
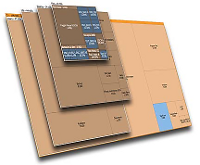
SpaceSniffer is a freeware disc space analyzer for Windows that make use of the Treemap concept to view the current disk usage. Among the most notable features you’ll find drag and drop support, intuitive structure layout (multiple views for different media), zoom elements (browser-like navigation), powerful filtering (you can filter your results based on size, file name age), customizable options (geometry, colors, behavior), fast scan of your hard drive (navigation works even when the scan didn’t finished), support for NTFS Alternate Data Streams and so on. Finally, this program is fully portable on all popular Microsoft Windows versions (doesn’t have a setup file, therefore it doesn’t mess up with your current registry – it just adds a XML configuration file). You can use the executable file on other Microsoft Windows OS, there’s no need to extract the archive each time.
SpaceSniffer Review
Install: There’s no setup file, as this software is delivered as a compressed Zip archive where all you have to do is to extract its content and run the program. If your archive manager doesn’t create (automatically) a folder for you, make sure that you first create one and extract the content of SpaceSniffer archive in it, otherwise it will extract multiple files and you’ll have to look for ‘SpaceSniffer.exe’. The current version (1.1.4.0) has been tested on Windows 7 Ultimated Edition (32-bit) and Windows 8.0 (64-bit) and it worked well on both Microsoft Windows versions.
Main usage: You’re here because you probably have no idea where the HDD drive space disappeared or you just want to see if you can delete some occupied space with all kind of files that you forgot but there are so many that it’s time consuming to manually review them. SpaceSniffer will help you to reclaim space in seconds (maybe minutes on large hard drives/partitions). For those who never used this software before, I will split the action in three categories: scan process, taking action and (optional) saving data.
Scan process: The first thing to do after you run SpaceSniffer for the first time is to choose a partition and perform a quick scan (the program will ask you to choose the drive partition or type the path). The scan should finish quickly, there’s a status indicator on the right-corner (up) of the main software interface.
Important: If you scan the system partition (the one that Windows is currently installed) make sure that you don’t delete files that are required by your operating system to run. It’s easily to feel ‘lost’ in your operating system data but you shouldn’t mess with those files, unless you really know what you’re doing.
Taking action: Once the scan is finished, you will be presented with a window containing a list of all files found grouped by their data type (free space, operating system files, other type of data). From this point, you can ‘browse’ or better said ‘zoom’ inside each file so that you can discover other files included in a certain folder until you get to the last one. For instance, if you have a folder that contains other 10 folders and each one has others folders, you can easily take a look to see what’s inside of them. Once you identified the type of the files and their size you can choose a further action: delete or keep them with a single ‘right-click’ of your mouse on that file and choose ‘Delete’. Just in case that you feel lost after browsing through your hard drive space you can always ‘Go Back’, ‘Go to upper leve’, ‘Go Home’ or even ‘Perform a new master scan’ – you have all of these buttons in the navigation bar of SpaceSniffer.
Saving data: A powerful feature that you won’t find at other similar tools is the ‘Export to file’ option. For any reason, if you want to export the data found with this tool, you can use the ‘File’ option from you menu and from there choose ‘Export to file’. To customize your export form choose your data type (please note that you have a customization option next to ‘Configuration’): ‘Grouped by folder’, ‘Simple file list’ or ‘Summary’ and save the stats.
Conclusion: There’s much more to say about SpaceSniffer. If you’re a system administrator or an advanced user you can search for specific files using filters (you can even combine multiple filters), tag certain files to keep track of examined files, exclude tagged files, etc. You can customize this program in many ways, although the Tips and Tricks section doesn’t list many of them. There are many other options included, I didn’t listed all of them. My personal opinion is that the largest base of users are regular home users that simply wants a free disk usage analyzer that can help to clean/free some occupied space on their computers. Without a doubt, this is an excellent disk usage (hard drive) visualization tool that works great for both novice and advanced users. Considering its free, clean and portable I would highly recommend a donation to the author to support his wonderful work.”
 SpaceSniffer is our Geek Software of the Week! It provides a TON of information on your PC’s disk usage! If you are trying to clean up, this is the tool you need!
 One particularly helpful option is in the “Startup” tab. You will see a list of all the utilities, etc. that run automatically on startup. You can speed thing up by trimming down the number of things listed here. Just don’t go to crazy, or something you need might not work!
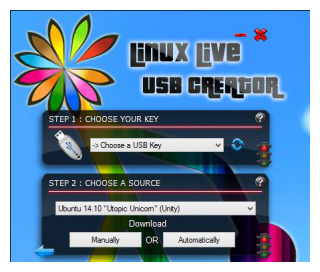
 Have you ever wanted to try one of the many, many Linux Distros? Now it is easy with LinuxLive USB Creator! Use it to install a distro and reboot using your USB drive as your boot drive (you will have to set your computer BIOS to boot off the USB stick first.) Very cool!

